Friday, 29 June 2012

Chocolate Brioche Pudding


This is one of my favourite desserts.  A fancied up bread and butter pudding, but still super simple.  I found it about 5 years ago in a Donna Hay Magazine.  I have vivid memories of several times that I made it.

My gorgeous Cornish friend Verity came to stay with us the week before we got married. When I stayed with Verity in the UK, she was such an amazing hostess. Her cooking is truly incredible.  She has this knack of throwing things together that you wouldn't think are anything special but it is somehow out of this world.  We had some very funny, mischievous and lovely times over there together. 

She was so incredibly lovely to fly all the way over from the UK for our wedding and as we were cooking soul mates, I had a full week's worth of delicious meals planned to show her my appreciation for her support that week.  Only trouble was, I was so nervous about the wedding (not the marriage!!!) that I had no appetite and was nauseous all week!!!   I loved cooking for her while she was here and she was so much fun to have around me in that week and especially on the wedding day.    

This is one of the dishes I made when Verity was here.  I had my long suffering brideslave, I mean bridesmaid, Claire, my beautiful flower girl and our MC all over for a bit of an unofficial rehearsal dinner. This was dessert.

The next time I made this dish, I was 10 weeks pregnant with my first baby.  I remember obsessively overcooking it to ensure the eggs were cooked through!!!  Paranoid pregnant lady I was. ;-)

Ok, enough memory lane trips, here is this delicious dessert. Easy to make ahead and incredibly satisfying to eat!

I visited Movida Bakery a few weeks ago and in amongst their incredible breads, donuts, pastries and pies, I spied a loaf of brioche. I LOVE brioche!  I bought the loaf knowing this dish was in our near future.

If you can't get brioche (or don't want to make your own) you can use a sweet Greek style egg bread or a Jewish Challah as an excellent replacement.  Or regular bread or croissants if you prefer.

The best chocolate to make this with, in my opinion, is no longer readily available in Australia - sob!!!! Green and Blacks Butterscotch. Oh my goodness, that chocolate is incredible! Verity introduced me to it.  Now I use either Lindt caramel or one of the other ones pictured below. All incredibly good!  The caramel one makes a fab toffee crunch and the other Lindt in the red box adds a fabulous ooziness.  I usually like to use a combo of both.  Dark chocolate would be lovely in this dish too.


Chocolate Brioche Pudding
original recipe from Donna Hay Magazine, Issue 32

Makes 8-10 small ramekins, 6 medium or 4 pretty large ones!

Ingredients:
  • 400ml milk
  • 300ml cream
  • 5 egg yolks
  • 1/2 cup golden castor sugar (or regular castor sugar)
  • 2 teaspoons vanilla extract 
  • Approx 200-250g brioche (I used half a large loaf and froze the rest for another time.)
  • 250g of the best chocolate of your choice
Directions:
  • Preheat oven to 180 degrees Celsius
  • Tear or cube the brioche

  • Break or cut up the chocolate in to smaller chunks


  • Heat milk and cream in small saucepan until it just comes to the boil

  • In a large jug, whisk together egg yolks, sugar and vanilla


  • Gradually add the warm milk and cream mixture to the egg yolk mixture whisking to combine


  • Divide the brioche and chocolate amongst your ramekins - you want a LOT of brioche in there otherwise the end result will be too runny. And I like to ensure even distribution of chocolate throughout :-)


  • Fill the ramekins up with the custard mixture


  • Place ramekins in a baking dish
  • Pour hot water in the baking dish until the water reaches half way up the ramekins

  • Cover with foil and bake for approximately 15-25 minutes (depending on the size of your ramekin)
  • Remove foil and bake for an additional 10-15 minutes until golden on top and the custard has set


  • Serve warm.  


I made some of these in little gorgeous little baking cases I bought from Emerald and Ella and took them to the movies for my girls night out with my lovely friend Jen.  Not quite as nice at room temperature, but an excellent movie treat!!!


Happy baking!


Love Amy xoxo

Tuesday, 12 June 2012

Cauliflower and Cheese Fritters


Instagram is a dangerous space when you're hungry. It's full of lots of yummy inspiration!

The loverly Cat posted a photo of cauliflower fritters the other week and I HAD to make some. I'm completely obsessed with cauliflower at the moment - roasted cauliflower soup with crispy sage and hazelnuts as well as this yummy roasted cauliflower, baby carrot and goats cheese dish, and Cat's Cauliflower Dhal.. As the craving hit, there was no time to request and wait for recipes, so after googling a few recipes (this one in particular was my basis) this is what I came up with.  I really wanted to emulate the classic cauliflower and cheese dish of my childhood, and I achieved that with the ooziness of these yummy fritters.  I also couldn't decide if I wanted roasted  cauliflower or steamed, so I did both! The roasted is more nutty and the steamed more soft and traditional. You can choose whichever you prefer - both were delicious.

I declare this my new favourite home cooked lunch!!!!

Cat and I decided to both post our cauliflower fritter recipes today and link up for Fritters with Friends! Well, Cat is calling it "fritters two ways", but as I've already mentioned, I like CHEESE!!!! ;-)

Here is my version:

Cauliflower and Cheese Fritters with Labne and Mint.

Ingredients:
  • 1 small cauliflower or 1/2 a large head of cauliflower - roughly half a kilo
  • 2 eggs
  • 80 mls of milk
  • 2/3 cup of plain flour
  • 1.5 teaspoons of baking powder
  • 3/4 cup of grated mozzarella cheese
  • 1/2 cup of finely grated Parmesan cheese
  • a couple of shakes of ground cumin
  • ground pepper
Directions:
  • Cut cauliflower in to small florets and roast them drizzled with olive oil and salt and pepper at 180 degrees Celsius for 17-22 mins or until lightly browned and tender  (depending on the size you've cut them) - turn them around half way through so all sides get browned.  OR steam them for a few minutes in a double boiler until just tender.  OR do a combination of both!  Allow to cool.

  • Whisk together eggs and cheeses and milk and lightly whisk in flour, baking powder, cumin and ground pepper to taste.


  • Stir through the cooled cauliflower.  It's a very thick batter, not runny like pancakes.

  • Heat a large pan over medium-high heat and add a small amount of olive oil.

  • Once the oil is hot, dollop large spoonfuls and cook for a few minutes on each side until crispy and golden brown on the outside and the filling has puffed up.


  • Drain on paper towel

  • Sprinkle with sea salt and serve them hot with labne and fresh mint.*
  • My kinder boy enjoyed these cold in his lunch box.
  • These freeze really well too - just reheat from frozen by wrapping them in baking paper and putting them in a 180 degree oven for 20 minutes turning half way through.  Uncover them for the last 5 minutes.


Oozy, stretchy cheese goodness!!!


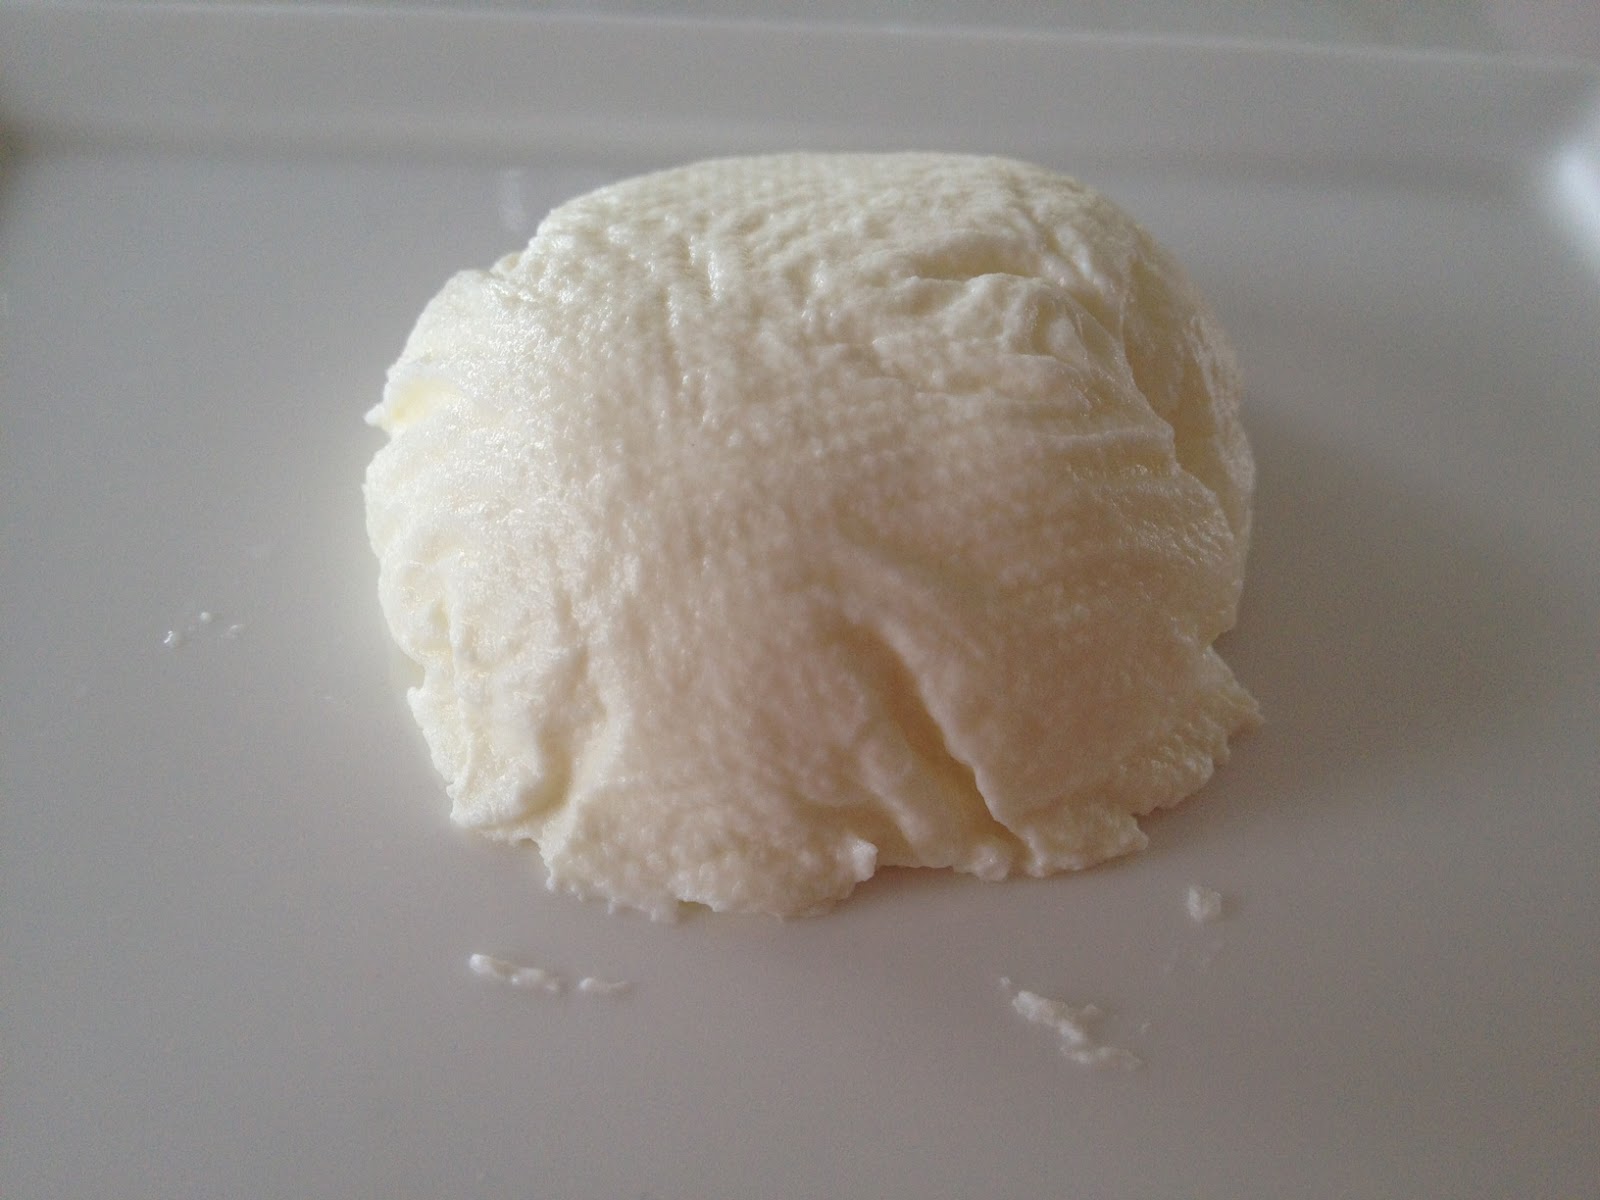
*Note - to make labne, just put some paper towel in a small sieve over a bowl and fill with natural yoghurt that has had some sea salt stirred through it. Cover with more paper towel. Allow to sit in the fridge overnight, or if you're impatient like me, just do it for 20 minutes on the bench while the fritters are cooking. ;-)


You can find Cat's recipe here - I'm hanging to see her version that inspired my new favourite lunch!

Enjoy!

Love Amy xoxo

Tuesday, 29 May 2012

Quick Walnut & Pecan Bread


Despite having made bread many times (favourites being pizza dough, Fat Mum Slim's brioche, and Annabel Langbein's Busy People's Bread), I always feel a bit intimidated by the thought of it.  I'm not sure why though.  If you choose a straight forward recipe, it's actually incredibly simple. And VERY satisfying to eat your own bread!!!  I highly recommend trying Annabel's bread that I've linked above as a super simple but really yummy bread. I make it very often.  One day I invited myself over to my friend Claire's house with both of my kids in tow at and was supposed to stop for bread on the way.  It was literally easier for me to make this bread than to stop at the bakery with my two kids!!!! My 3 year old does most of the making of that bread, just a wooden spoon and bowl recipe.

A couple of weeks ago, the bread queen Phillippa led a bread making masterclass on Masterchef.  She made a walnut bread that looked incredible.  Recipe is here.  The same week was Jamie Oliver's Food Revolution.  Ruth had written a post about it (here) and had also posted a series of photos on Instagram of one of her gorgeous boys baking the walnut bread.  It only took the very first Instgram pic to motivate me to make walnut bread that Saturday morning too!  We had a couple of handful of fresh walnuts that were sitting around waiting to be shelled so it was a perfect craving.

However, I didn't have all of the ingredients (or the patience) for proper bread.  It was already 10:30 and I knew the boys would be starving by 11:30.  I googled a few recipes on my phone and found a recipe by Hugh Fearnley-Whittingstall (from the British show River Cottage).  I still didn't have all of the ingredients for this recipe either, but chose to adapt it and stay in my pjs rather than go to the shops!

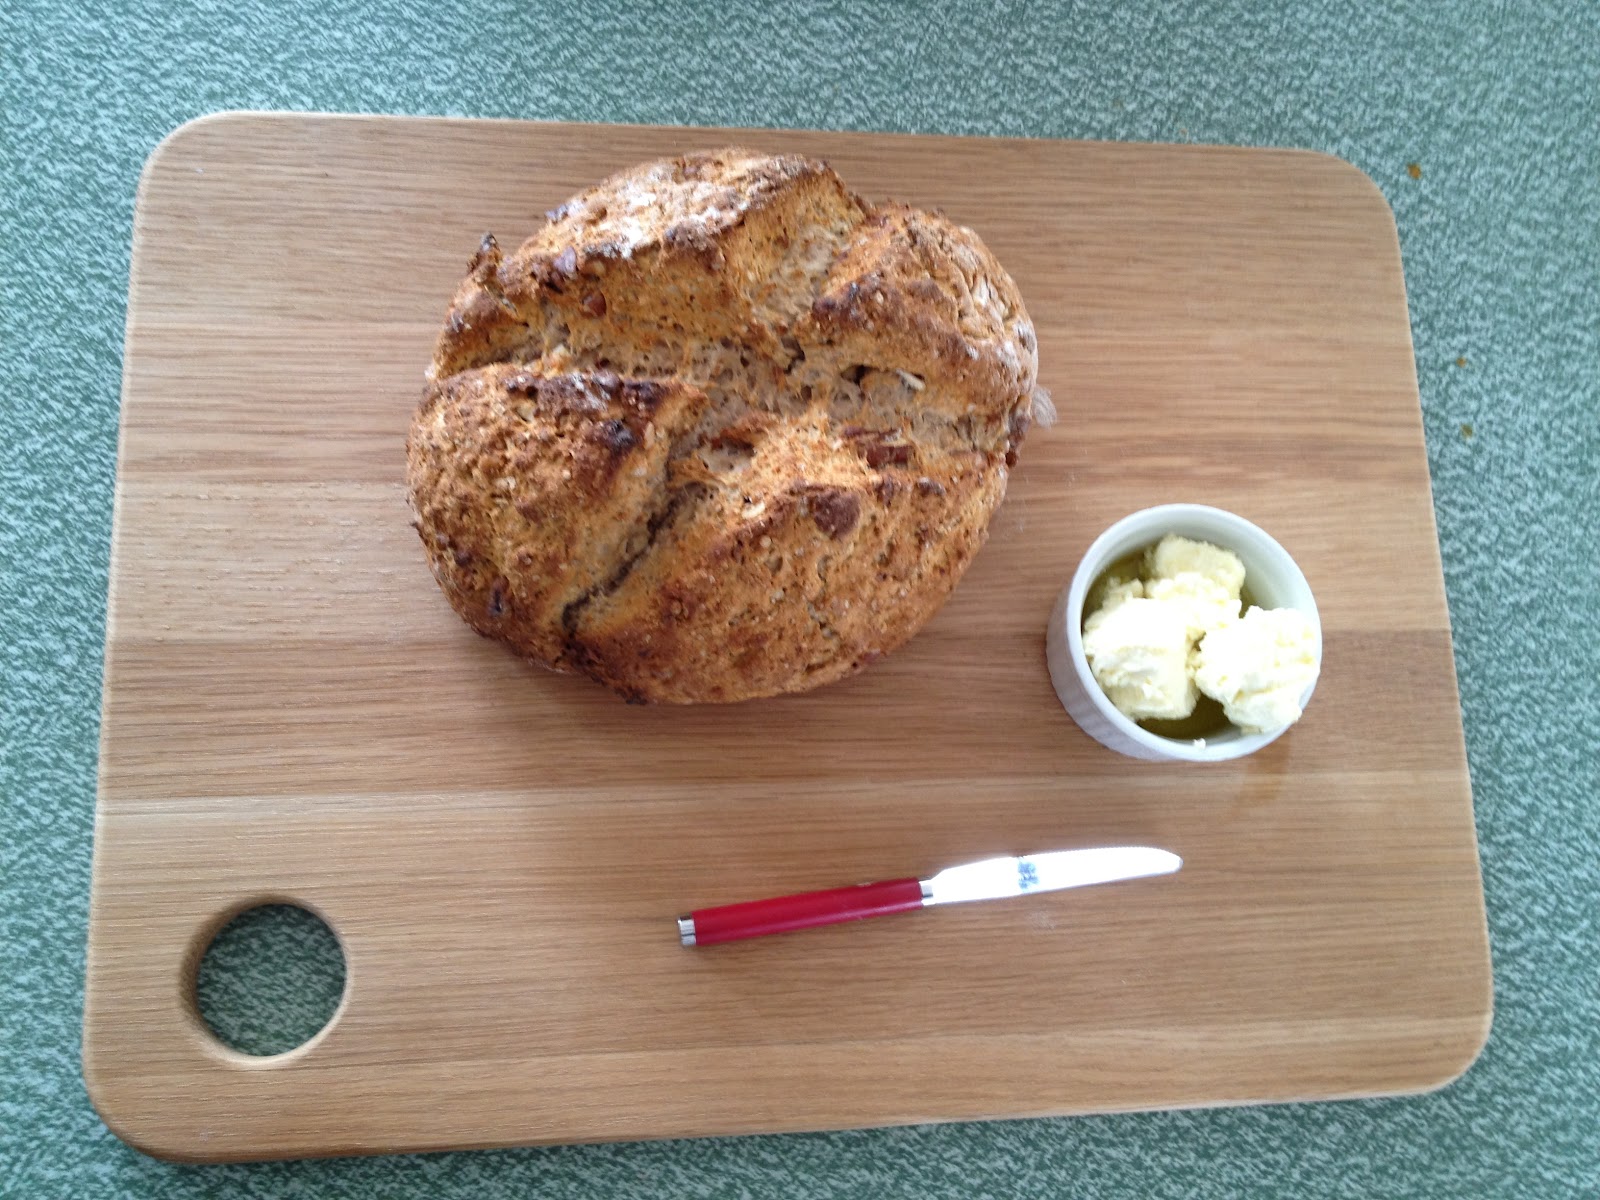
There is no yeast in the bread, so no proving or resting or rising time. It's a sweet bread so I think you could lessen the honey/golden syrup significantly if you wanted to, but the sweetness is lovely.  It's more of a stand alone bread rather than for sandwiches.  Perfect with some special cheese or simply good quality butter.

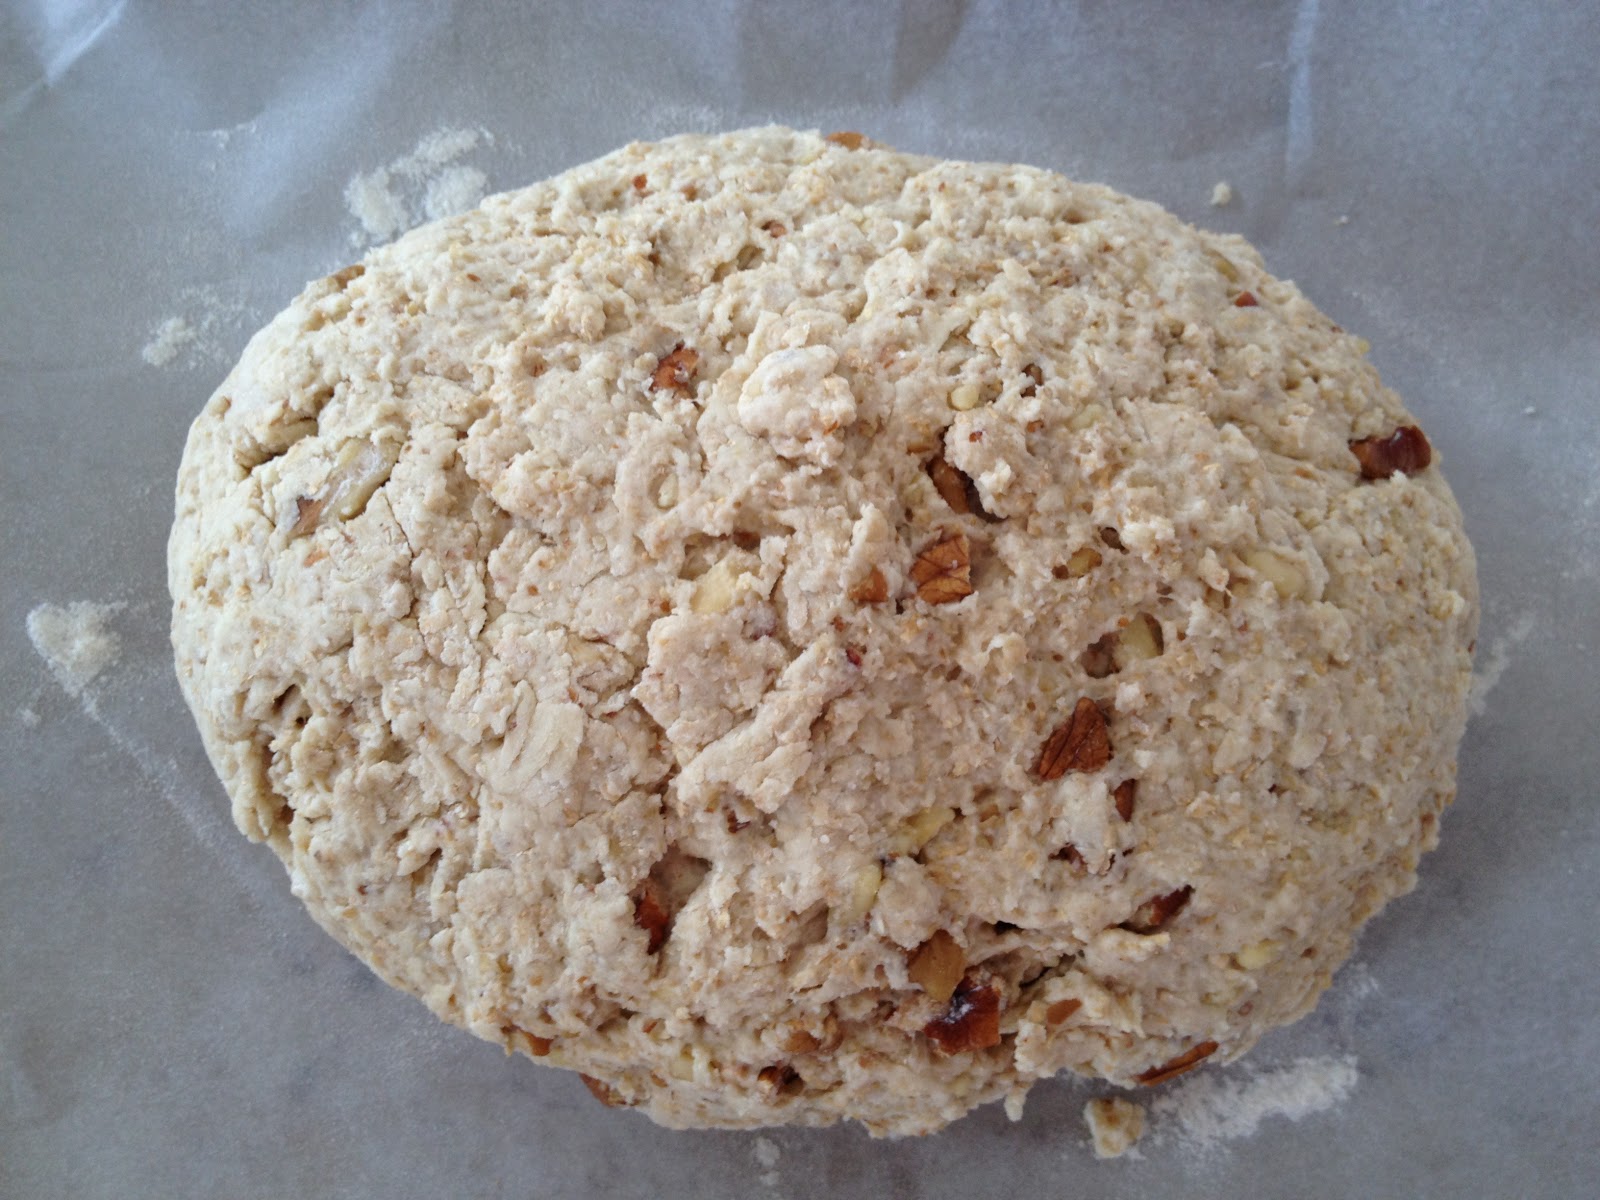
Here is the version I made with Mr 3.

Quick Walnut & Pecan Bread, based on a recipe by Hugh Fearnley-Whittingstall.

Ingredients:

  • 200 grams of 00 flour
  • 300 grams of wholemeal plain flour
  • 100 grams of walnuts
  • 100 grams of pecans (or any combination of walnuts & pecans or just one of them, whatever you have or whatever you like!)
  • 150 grams of honey or golden syrup (again, you could also do a combination which is what I did.)
  • 4 teaspoons of baking powder
  • 10 grams of salt

Directions:

  • Preheat oven to 190-200 degrees Celsius
  • Put flours & baking powder in a large bowl


  • Heat the honey/golden syrup in a small saucepan with 300ml of water until dissolved (but not hot.)


  • Divide the nuts in to two halves - one half, keep the nuts in chunky pieces


  • For the other half, crush them up in to a rough chunky powder


  • Add both piles of the nuts to the flours & stir well


  •  Add the honey/golden syrup water to the flours and mix gently until combined (but don't over mix)


  • Turn on to a lined baking tray and shape in to a circle or oval


  • Cut two slits quite deeply in to the bread and put in the oven for 30-40 minutes until the bread is brown and well risen. That's it!


  • Serve warm with butter or really lovely cheese. My favourite is marinated feta - YUM!!!  Although my sous chef likes his with jam. :-)


Happy Baking!

Love Amy xoxoxo

Monday, 7 May 2012

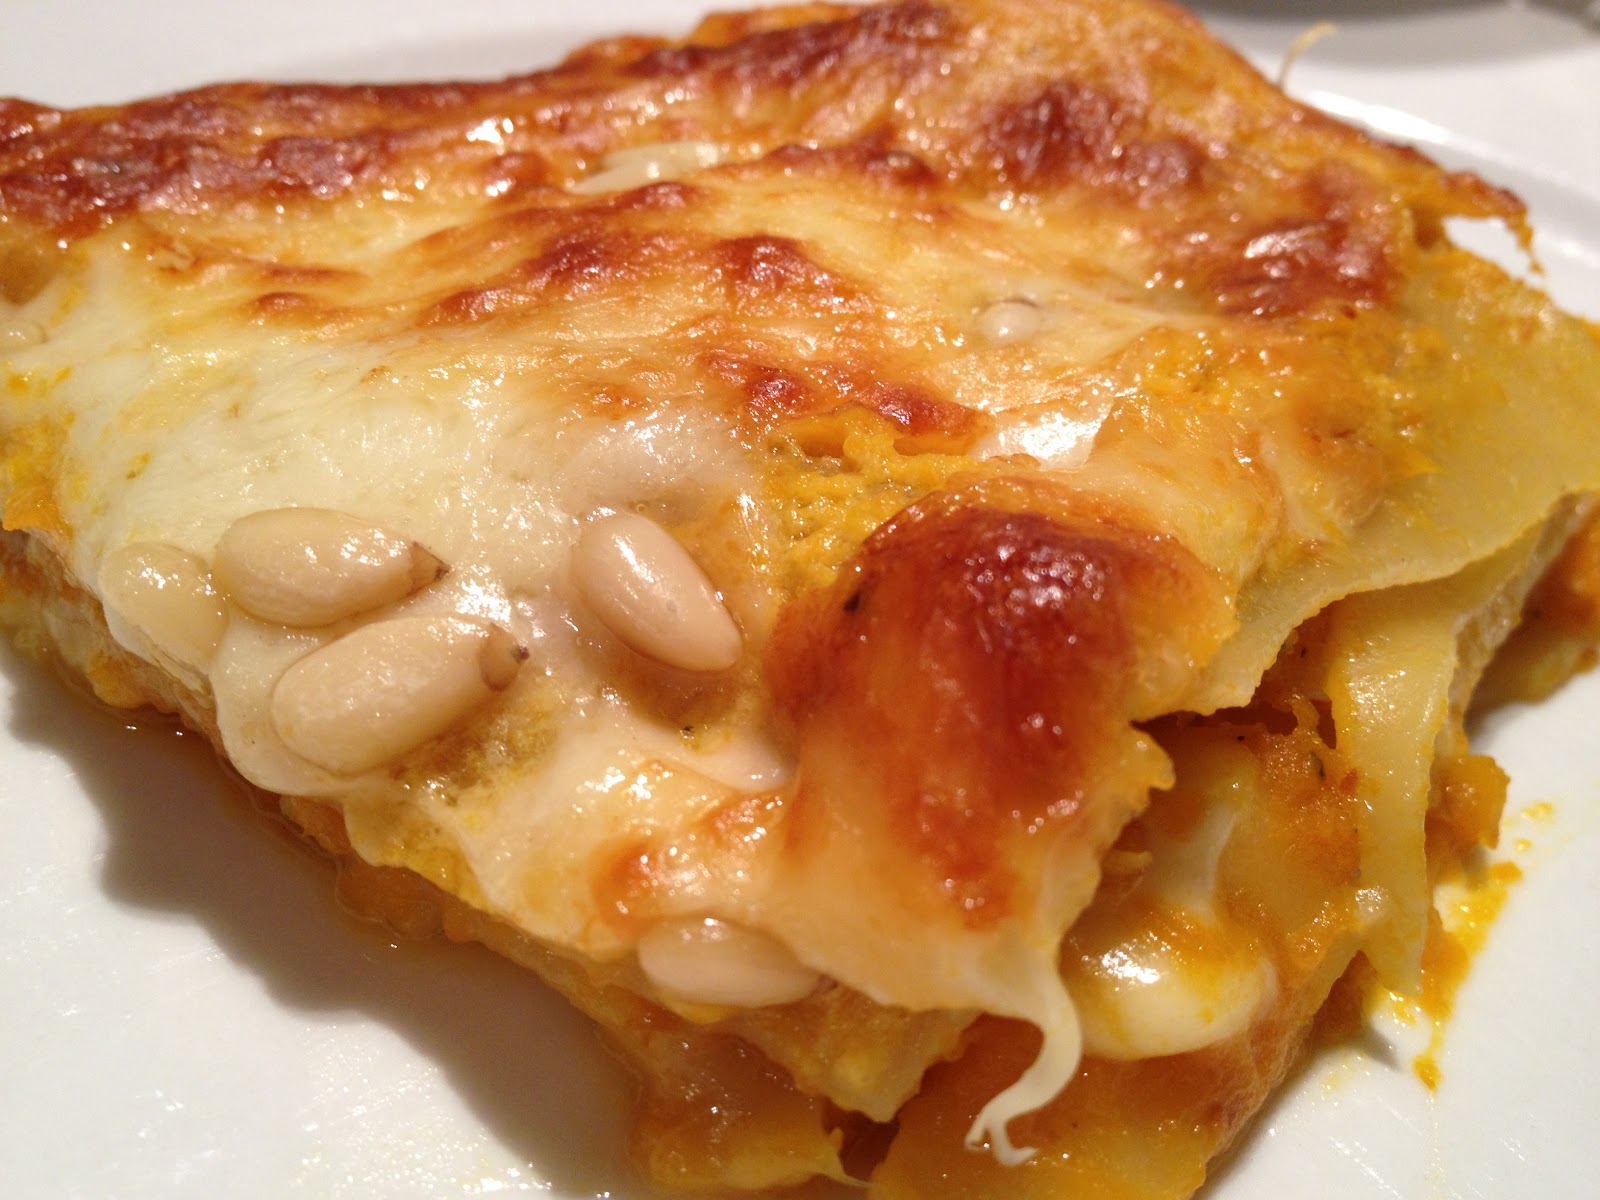
Roast Pumpkin & Pine Nut Lasagna


This is one of my favourite recipes.  I often vary it greatly and have outlined some options below the recipe.  Adding other veggies or changing the "white sauce" are all good variations.  You can definitely make it lower in fat with some of the variations too - eg using low fat ricotta and less mozzarella and Parmesan, roasting the veggies in just a tiny bit of oil spray instead of liberal amounts of olive oil.  I usually do make it lower in fat when I make it for a regular family dinner, but this version is the tastiest and most rich and pumpkiny in my opinion.

Ingredients:
- Lasagna sheets - I either use the dried instant ones or make my own fresh - I don't think the "fresh" from the supermarket are as good for this recipe (although I've used them several times). I like the thickness of the dried, instant ones and the al dente texture which you can't really achieve with fresh pasta.
- 2 very large pieces of pumpkin - I usually use 2 different varieties - this time I used Kent and Grey.
- 3 whole garlic cloves, unpeeled
- 12 fresh sage leaves, washed and dried
- good quality olive oil
- a few good handfuls of freshly grated, good quality Parmesan cheese
- 300 grams of grated mozzarella
- 180 - 250g mascarpone - (I had a 250g tub which I'd already used some of for another recipe. If you're only using the mascarpone for this recipe, then you use the entire tub so as not to waste it.)
- raw pine nuts

Method:
- preheat oven to 200 degrees Celsius
- peel and cut the pumpkin in to large chunks and scatter on two oven trays lined with baking paper
- add the garlic cloves (unpeeled), drizzle with olive oil and sprinkle with sea salt and ground pepper & roast for 20 minutes


- Turn the pumpkin around, add the sage leaves and drizzle with more olive oil if needed
- When the pumpkin is well roasted and the sage is crispy, remove from the oven and turn it down to 180 degrees Celsius


- set aside the crispy sage leaves


- squeeze the garlic out of the skins and discard the skins
- roughly mash the pumpkin and garlic together with a fork


- finely crumble the sage leaves and mix through the pumpkin


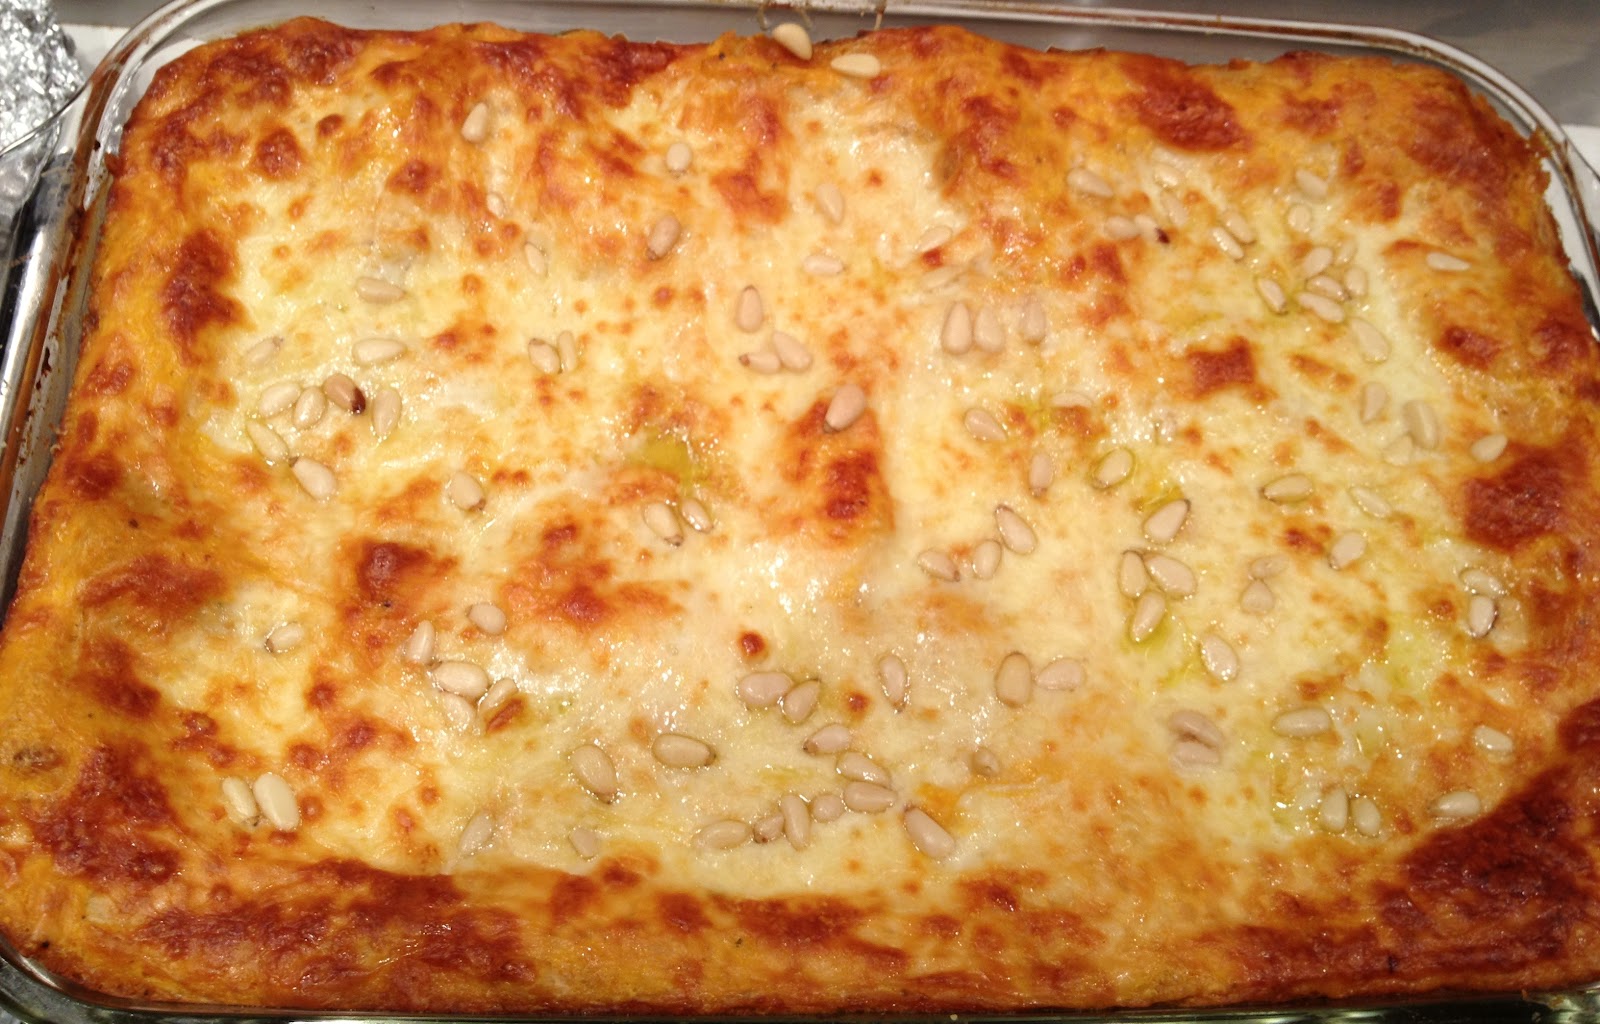
- *important* Add some water to your mashed pumpkin so it's runny. You need the extra moisture so the lasagna sheets have enough liquid to cook them through and so the final dish isn't too dry. I used probably about 180mls this time as I used dried instant lasagna sheets.  If you're using homemade fresh lasagna sheets then you'd only need to add a little bit of water to loosen the mixture.  You can see the difference in texture in the above photo and the one below.
- divide the pumpkin in to 3 decent sized portions and 1 smaller, half sized portion
- spread a layer of the pumpkin mixture on the bottom of your dish and top with one layer of lasagna sheets


- add another layer of pumpkin mixture, this time add a large handful of mozzarella and Parmesan cheese before you add another layer of lasagna sheets


- another layer of pumpkin and lasagna sheets
- spread the final, smaller amount of pumpkin mixture over the top lasagna sheets, add the mascarpone cheese and spread evenly (the mixture will become a pumpkin and mascarpone combination rather than two separate layers)


- top with lots of mozzarella and Parmesan, drizzle with a bit of olive oil, cover with baking paper and foil and bake in 180 degree oven for 45 minutes


- remove the baking paper and foil and bake until starting to lightly brown (approximately another 10 minutes)
- scatter the pine nuts on top and bake until browned


- serve hot on it's own or with a rocket salad.  It's even better the following day and it freezes very well.


Variations:
- add a layer of thinly sliced half moons of roasted zucchini
- add a layer of balsamic roasted cherry tomato halves
- add a layer of wilted spinach
- make a traditional white sauce with flour, butter, milk & cheese
- use a combination of ricotta and feta for the "white sauce" layer
- use creme fraiche or sour cream for the "white sauce" layer
- use low fat ricotta and some milk stirred together for a lower fat version


I hope you try this and love it as much as I do!

Love Amy xoxo