Showing posts with label Baking. Show all posts

Sunday, 25 January 2015

Zucchini, cacao and seedy muffins

Hello!

We currently have a MASSIVE zucchini crop and I'm putting them in basically everything.  Crumbed zucchini, chicken and veggie lasagna, mexican chicken and veg, roasted zucchini soup, stuffed zucchini flowers etc etc.  My kids are about to head back to school and kinder (sob!!!) so it's time to start filling the freezer.  I'm trying to use more coconut flour lately just to give us some variety from wheat flour.  After googling I found this recipe and changed it up to make it nut free and also added extra seeds on top and make use of what ingredients I had on hand.  These are full of protein and will keep my little busy bees going during their long days at school and kinder.


My 4 year old is super fussy with what he eats, but he picked the zucchini from the garden and helped me make these and he loved them! Whoo hoo!


Zucchini, seed and cacao muffins

Ingredients:
- 1 cup of seed butter (I used half sunflower seed butter and half tahini because I had half a jar of each on hand)

- 1 cup of finely grated zucchini (liquid squeezed out)

- 2 eggs

- 1/3 cup maple syrup

- 4 tablespoons of coconut flour

- 2 tablespoons of chia seeds

- 1.5 tablespoons of raw cacao

- 1 teaspoon of baking powder

- sunflower seeds to sprinkle on top


Method:
- preheat oven to 170 degrees celcius

- line your muffin tray with paper cases - this recipe makes approximately 12 large muffins, or 18 smaller medium sized ones

- mix together seed butter, eggs & maple syrup until no lumps are left - I used the kitchen mixer

- gently stir in coconut flour, chia seeds, cacao, baking powder and zucchini until smooth

- fill cup cake cases half full with mixture 

- top with a sprinkling of sunflower seeds


- bake at 170 degrees for 15-18 minutes depending on the size of your muffins


Enjoy!!!!

Love Amy xoxoxo

Wednesday, 12 November 2014

Carrot, Apple & Coconut Muffins and Cakes

Ok, I'm worst food blogger ever! There's a good way to start!  Hopefully I can redeem myself with this ridiculously easy but delicious recipe!


I think I keep putting off posting recipes because I don't have photos of all of the steps in the process of the recipes. I LOVE recipes with photos of every step. But with 3 kids under foot, the days of me having the opportunity to take step by step photos of everything I make are few and far between.  So, rather than putting off sharing recipes any further, I now will endeavour to post a recipe even if I only have one photo of the finished product *gasps in horror!!!!*.  I also don't have that much to say, so the future posts may be short and sweet but will be documenting recipes I've made and loved. Keep it simple stupid! And as my friend Claire says - you're not building a piano!!!!  This little blog can be a recipe journal with a photo here and there. Onwards and upwards!

So, here's a recipe that I've made about a dozen times in the past year. A firm lunchbox favourite. Extremely adaptable!  You can make it as muffins or as larger cakes.  I made it as for my little Lady Babycake's first birthday cake. It's delicious! When I'm just making it for lunchboxes, I lower the maple syrup amount but for birthday cakes, I use the full amount. You don't have to use spelt flour or any wholemeal if you don't want to, but I tried it with spelt flour (regular and wholemeal combination) and it's my fave!!!! I'm converted!!!  For any info on the health benefits of spelt, I suggest you google and look for your own evidence. I'm happy that it's a healthier option and even happier that it's also tastier!  I just bought it from Woolworths - the Macro brand (not sponsored, just saw it and bought it!).

Next time I'm going to try it with coconut flour.  Not because I'm gluten free or in to fad food, but I love experimenting with different products and wheat free baking is good for a change. I've been using coconut flour lots lately and love it. Makes for super tasty and non dry cakes and muffins.

Whilst I'm on the topic, here are a couple of further thoughts on fad foods and wholefoods. I, clearly, love to cook. I also love to bake sweet things. But with 3 kids 5 and under, I'm getting more and more mindful of what foods are better choices for them and for me.  There are lots of fad foods out there at the moment. Some are awesome, some are gross! Um, maca powder - ewwwwww!!!!  I know it's supposed to be awesome but I can't stand it!  The approach I am taking with 80-90% of the food in our house is wholefoods. Fruit, vegetables, meat, chicken, fish, nuts, legumes, dairy, grains etc. The best quality and freshest we can afford, grow and/or find. No food groups are excluded, but different choices are being experimented with. For example, I no longer use vegetable oil, instead I use proper butter, extra virgin olive oil and cold pressed, unrefined coconut oil. It's not about fat, it's about how wholesome it is.  Less processed sugar is also happening. But I can assure you that I have not jumped on the "I quit sugar" bandwagon! Fruit is awesome. Maple syrup is delicious! And sometimes, you just NEED to make salted caramel brownies jam packed full of refined sugar!!!! ;-) I could continue to ramble on about this, but I won't. Instead, I will introduce you to these 3 awesome ladies:

- No nonsense nutrition guru Katie180. Visit her blog or follow her on Facebook for some little pearls of wisdom.  No extremes and loads of interesting information.  Plus she likes cake :-)

- The fabulous Heidi at Apples Under My Bed is a dietitian who loves to eat and cooks the most delicious food. I've made lots of her recipes and I'm inspired daily by her instgram feed.  A fellow Melbournian and an awesome chick.

- Bianca at Wholefood Simply has so many straight forward but gorgeous recipes- particularly baked goods with healthier ingredients.  I made her coconut bread in muffin form yesterday and they were awesome!

All 3 blogs are full of really ace recipes that are delicious, simple and mostly wholesome without any deprivation!

Ok, what was I saying earlier about having nothing to say?!?! See why I don't blog very often?! I start rambling.

Here's the recipe! Finally!

Carrot, Apple & Coconut Muffins and Cakes

Ingredients:
150 grams of spelt flour
100 grams of spelt wholemeal flour
80 grams (1 cup) of coconut
3 teaspoons of baking powder
80grams of cold pressed, unrefined coconut oil, melted
3 eggs, lightly whisked
75-125ml of pure maple syrup (not the imitation stuff!) depending on your preference.
3 carrots, grated (squeeze some of the juice out and discard or drink it!)
2 apples, grated (same as with the carrot juice!)


Method:
- Preheat oven to 160 degrees
- Mix all of the ingredients together with a wooden spoon.  That's how easy this recipe is!


- pour in to patty pan cases or lined and greased (with coconut oil) cake tins


For muffins/cupcakes - bake for approximately 15 minutes depending on the size you use - I make about 36 medium muffins from this recipe usually but have also made larger ones and mini ones.  Once the muffins are golden and cooked all the way through, they're done.  Here's some photos of the muffin version that are a regular lunchbox item for my kiddos.


For larger cakes - bake for approximately 30-40 minutes. I made 3 small, flat cakes with this recipe ready to be stacked with maple cream cheese frosting - yummo!!!!  Here's some pics of the cake as seen at Lady Babycakes First Birthday.


I hope you try these and love them as much as we do!

I shall endeavour to post another recipe soon….I have about 20 waiting in the wings...

Love Amy xoxo

Monday, 7 October 2013

Apple and Rhubarb Crumble Cake

Hello lovely readers!

Apologies again for the sporadic and neglectful manner I have been updating this blog! I have about 20 posts drafted and half finished so I hope to eventually get them all completed and published soon...maybe when my youngest goes to school in about 5 years?!?!?! Anyway, here's one I had to type up urgently before I forgot how I made it!

For those of you who are on Instagram, you might have seen this little beauty being created on the weekend. It was goooooooooooooooooood!!!


I served it with warm vanilla custard – I used this recipe as a base but used milk instead of cream, raw caster sugar instead of white (caramel flavour!), doubled the cornflour and used vanilla paste instead of extract. Worked a treat!


Ingredients:
- 100g butter, softened
- 50g  brown sugar
- 50g raw caster sugar (regular caster sugar is fine)
- 150g plain flour
- 50g cornflour
- 3 teaspoons baking powder
- 3 eggs
- 2 teaspoons of vanilla paste
- 2 teaspoons lemon zest
- 6 sticks of rhubarb (it was a bit less than a full bunch – I saved some to stew to go with my porridge for breakfast!)
- 2 granny smith apples
- ½ lemon


For the crumble:
- 125g plain flour
- 125g butter, cubed and keep cold in the fridge
- 50g brown sugar
- 50 g raw caster sugar
- 25 demerara sugar (you can use 125g of just one type of sugar if you like! I just used the combination of what I had and what I like.)
- 1 teaspoon vanilla paste

Method:

Preheat oven to 160-170 degrees Celsius.

Grease and line a 25cm spring form tin. You could use a smaller one but adjust the cooking time as it will be a higher cake.


For the crumble:
Mix together all of the ingredients aside from the demerara sugar in a food processor until it’s like chunky bread crumbs. Don’t over mix – it’s good to have little chunks of butter. You could do this by hand if you don’t want to use a food processor. Then add the demerara sugar and give one last quick mix. Set the crumble mix aside in the fridge to stay cold.


For the cake:

Cut the rhubarb into 1-2cm pieces and peel, core and cut the apples in to 2cm cubes. Toss the fruit together with 1 tablespoon of the caster sugar and a big squeeze of lemon juice. Set aside.


Cream together the butter, sugar and vanilla with an electric beater for several minutes until smooth and fluffy. Add the eggs – do this very slowly so the mixture doesn't split! I usually add some of the flour in if it’s looking like it’s going to split. Add both flours and the lemon zest and beat until smooth. Finally add the baking powder and gently incorporate.

Poor the cake mixture in to the lined pan and spread out evenly.


Remove most of the liquid from the fruit and then add the fruit on top of the cake mixture.


Add the crumble mixture on top in a reasonably even manner.


Bake for 1-1 ¼ hours depending on your oven. You want the top to be nice and brown with a crunch, the centre to be cooked through and the base to be lovely and cooked. I cooked my cake for 1 and  ¼  hours at 160 degrees fan forced. Test with a skewer to be sure and keep an eye on it as you don't want it to burn if you have a super hot oven!  Leave to cool in tin. Then remove from tin, peel off the baking paper and serve at room temperature with warm custard or on it’s own.


Let me know if you try this one and if you enjoy it!!! It’s a large cake – we served 12 people and even froze two slices for another day.

Love Amy xoxo

Wednesday, 19 September 2012

Dulce de Leche Shortbread Sandwiches


Yet another Dulce de Leche or salted caramel recipe!  See more here and here and here!

These are delicious little shortbread cookies sandwiched together with salted caramel in the middle.  I think they would make lovely gifts for a special occasion - fathers day, mothers day, a birthday or for Christmas.  

I made the Dulce de Leche and the shortbread mixture and cut the cookies out the day before. I kept them in the fridge (the cookies were raw) until the following day when I baked and assembled them.  The cookies also freeze very well.  I prefer to freeze them raw but already rolled and cut out. The on the day you are giving them away (or a day or two before), you simply bake them and pipe on the salted caramel.

Original recipe from Donna Hay Magazine. Issue 60.

Ingredients:
- 1 batch of Dulce de Leche - you can buy this at some delis or specialty stores. In theory, the canned caramel at the supermarket is the same thing, but in my experience it doesn't taste as good and this is very simple.  Details below.

- 150 grams of unsalted butter, softened
- 1/3 cup pure icing sugar, sifted
- 1.5 cups of plain flour, sifted
- 2 tablespoons of cornflour, sifted
- 1 teaspoon vanilla paste

Directions:

- Make your Dulce de Leche according to David Lebowitz's instructions that you will find here.  I omit the salt before cooking, as I prefer to add it afterwards - I like the salt flakes to be visible.  So, once it's nice and caramel, remove from the oven and sprinkle lightly with sea salt flakes.  Set aside to cool.


- Beat together the butter, sugar & vanilla for about 10 minutes or until pale and creamy
- Add the flours and beat until a smooth dough forms
- Roll the dough between two sheets of non stick baking paper to about 5mm thick
- Refrigerate for 30 minutes
- Preheat oven to 170 degrees Celsius
- Cut out the cookies using a 4cm cookie cutter - it makes approximately 50 individual cookies or 25 sandwiched cookies
- Place the cookies on lined baking trays and bake for approximately 10 minutes or until a very light golden colour - keep a close eye on them as you don't want them to get dark as they will be brittle
- Allow to cool on wire racks
- Pipe the cooled salted Dulce de Leche on to half of the cookies and top each with another cookie - I try to pipe in the middle of the cookie leaving some space on the edge so that when you sandwich the cookies together, the caramel doesn't come out.  This is mostly so if you are packaging them for gifts, the caramel doesn't stick to the packaging.


Enjoy!!!!

Love Amy xoxoxo

Monday, 20 August 2012

Ice Cream Party


On Thursday I was having one of those days. You know the type. When you're home with two littlies who are super cranky and you all end up in a funk.  I needed a creative outlet, and my creative inkling always leans more towards the cooking side of things.  We were having friends over for dinner on Saturday night and I didn't have a clue what to make. They are the best kind of friends who don't care what's for dinner or how messy your house is, but I always like to make a dinner gathering an opportunity for me to cook up a storm!!!  Lacking any inspiration, I turned to my Pinterest boards and my favourite blogs to find something to spark my interest.  

One of the first food/style blog's I discovered was Eat Drink Chic which was created by another Amy. I fell in love instantly with Amy's blog. I especially loved her post about her surprise wedding and the ice cream parlour. Her gorgeous Ice Cream Parlour was the inspiration for this.

About half way through, I decided that I needed to also package up the extra supplies in the vein of this pin for my friend Claire - always an enthusiastic recipient of pretty and yummy parcels. This allowed me to get crafty as well as bake and share the love.  (Thanks Claire for sending through a couple of your photos to add to this!)

I had a ball making all of the bits and pieces to go in to the Ice Cream Bar. Friday was a very fun day - I pottered in the kitchen, baking and styling a little party while the boys played pretty happily. Mr 3 helped and incessantly asked to taste things. I was a bit mean and didn't actually allow him to sample anything except one teaspoon of ice cream while we were preparing! So here is what I made.

Vanilla Bean Ice Cream
I was considering making a few different ice cream flavours, but decided to stick to vanilla and have a variety of toppings and sauces.  I've linked to the fabulous David Lebovitz several times here already. He is the blogging ice cream guru!  His book The Perfect Scoop is brilliant. I, unfortunately, don't have a copy although I've bought it as gifts for several people so have read their copies. It's on my Christmas wishlist!!!  I used David's vanilla ice cream recipe - you can find it here.  It was a simple and extremely delicious and smooth ice cream. Far from plain old vanilla that you buy at the supermarket!  My husband has requested this become a staple in our freezer from now on!


Raspberry Frozen Yoghurt for the kids
I've spoken briefly before about sugar and my kids. I'm ok with them having some but not loads and I much prefer it to be in the variety of food that I've made myself, or with them.  Less preservatives and additives.   Mr 3 (nearly Mr 4) made this almost completely on his own!  I couldn't find the recipe I used for this last summer so don't have a link, but here is how we made it:

Ingredients:
- 1 litre of greek or natural yoghurt (unflavoured and full fat)
- 1/2 - 1 cup of golden castor sugar (we used 1/2 a cup as it was only for the kids but it may not be sweet enough for you, so just taste it as you go and add more if you like)
- 3/4 cup of raspberries (I use the frozen variety and let them defrost before adding them)
- 200 mls of full cream milk

Directions:
- Whisk all ingredients together until well incorporated
- Refrigerate until very cold
- Churn in ice cream maker

As this doesn't have a high fat content, it's very solid once frozen, but if you leave it out of the freezer for a little while just before serving, it becomes smooth.


Sauces
Being obsessed with all things peanut butter (and all things chocolate for that matter), I had to make Nigella's Chocolate Peanut Butter Fudge Sauce. It's all kinds of incredible!!! And extremely fast.


Another Nigella gem, this Sticky Toffee Sauce is ridiculously rich but really smooth and yummy.


Toppings
I decided to do a combination of homemade and store bought toppings.

Having made ice cream, I had 5 egg whites at my disposal and I loved Eat Drink Chic's use of meringues in her ice cream buffet.  I used this recipe from Taste as a basis and I made half of them in to mini meringues and made the other half in to larger raspberry meringues with the addition of the juice of some crushed raspberries. The larger ones were less stable and solid due to the extra liquid, but they were still tasty.  There were lots of extras so popped them in jars for some lovely friends to sample.


I made this Martha Stewart Almond Brittle recipe and crushed half of it to make praline and kept the other half in shards. Really yummy for a caramelly, nutty crunch!


I have a stash of raw cookie dough in my freezer in a few diffferent flavours.  Yes, it's kind of dangerous but also handy when unexpected visitors pop over for a cuppa - fresh cookies in 12 minutes!  I baked a few milk and white chocolate chip cookies and crumbled them up for a crunchy topping.  They were very yummy! I will post my go to cookie recipe soon - it deserves it's own post!


I had some really nice waffle cones in large and mini sizes and some mini marshmallows and a variety of sprinkles already so they were a nice easy option.


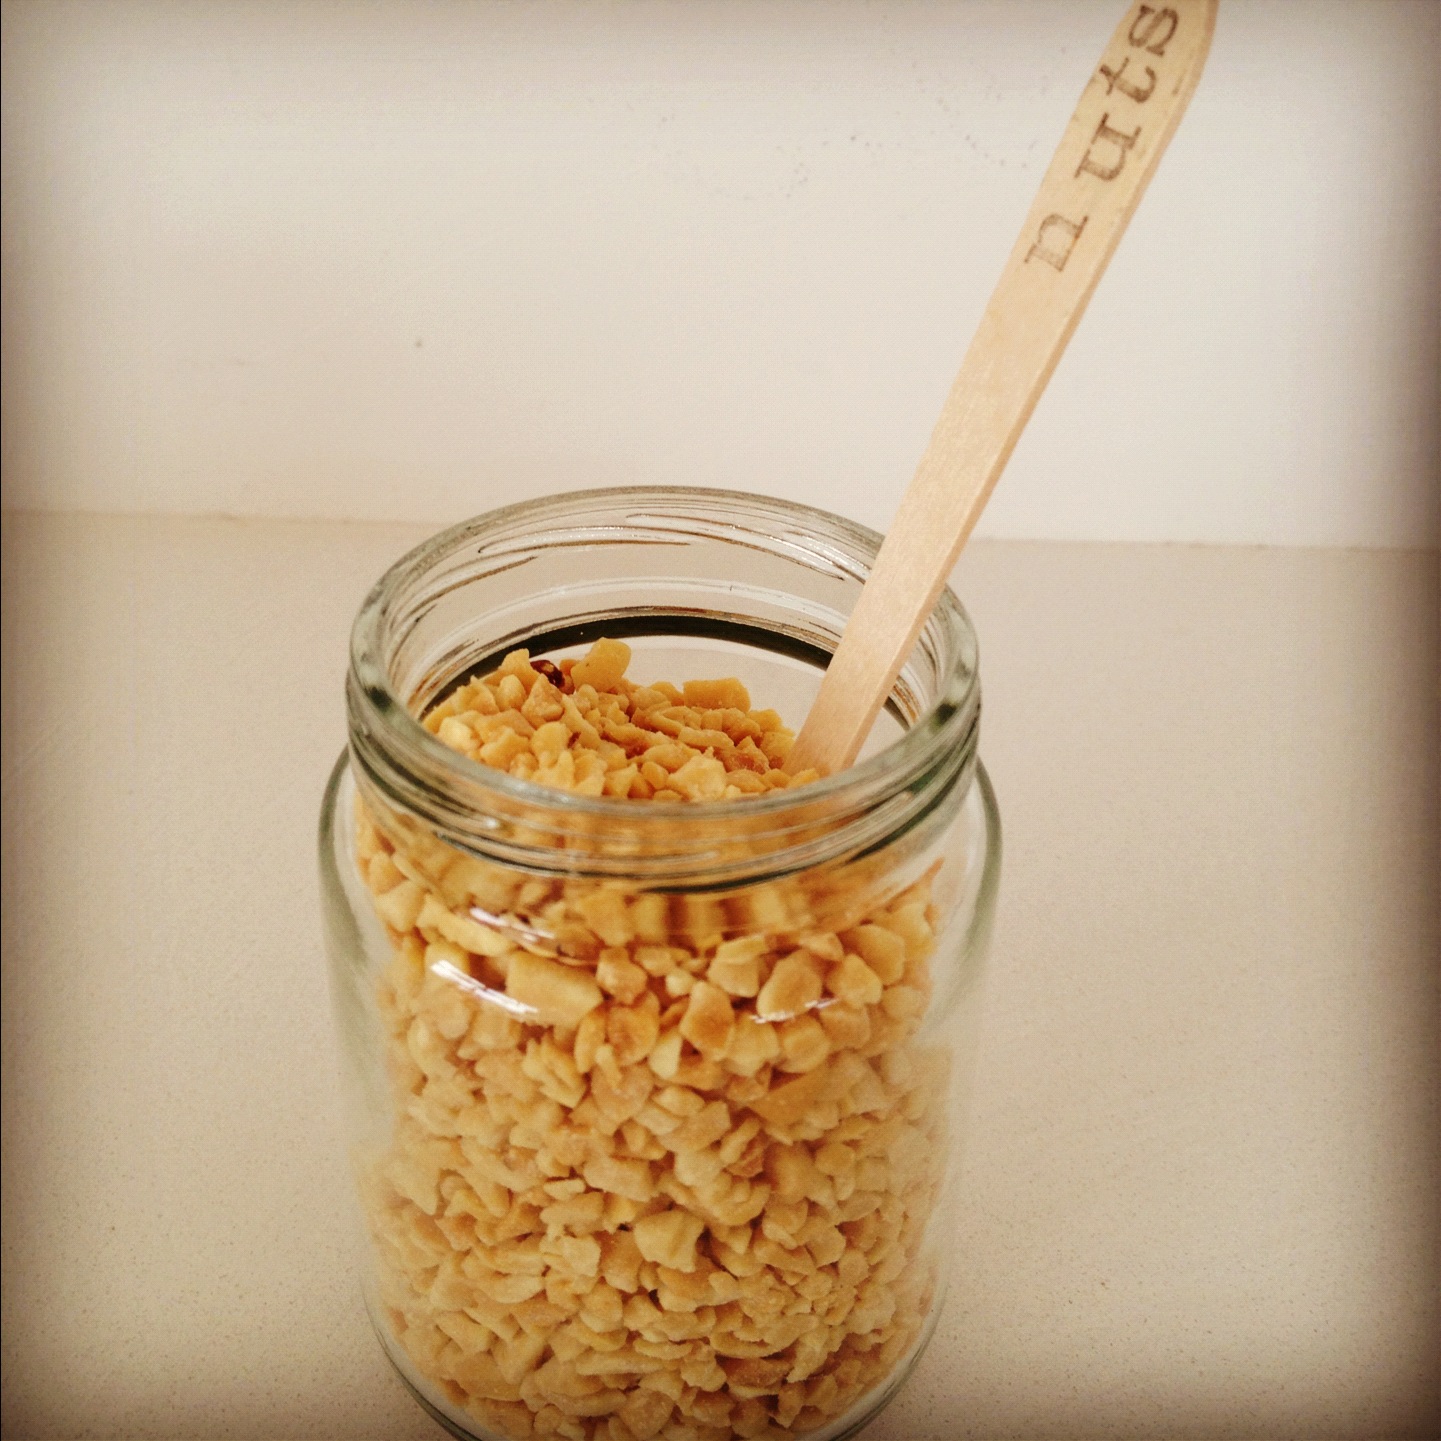
 I bought some mini wafer sticks which were yum and cute, some mini m&m's and some crushed peanuts.


The Ice Cream Bar
I used a mini stamp set to write the names of each item on to mini spoons. I got this idea from this pin.  I can't tell you how satisfying this was!!!!!  Can I pretend that Mr 3 made the messy ones though?!  ;-)


I plated most items up the day before and when our friends were here all I had to do was heat up the sauces and take the ice cream out of the freezer.  This is a winning feature these days as I am usually wrangling the boys and getting them ready for bed around the same time, plus I like to spend the time chatting with my friends rather than cooking while they are here.


Mr 3's selection - he was allowed to choose 2 toppings and he was very understanding considering the vast range of sugary offerings!!!!  Mr 1 just had the frozen yoghurt but loved it. He kept giggling with happiness!!!


I displayed the mini cones in a small ice cream dish filled with sprinkles and in some shot glasses filled with sprinkles - who knew my old shot glasses would come in handy again!!! I think the last time I used them for a party it was for vodka jelly shots - whoa, how times have changed!!! ;-)

The mini cones are such a fabulous size!  I used a melon baller to get the mini scoop size.


A couple of selections from the grown ups.


The Ice Cream Care Package
Using little clear bags, I packaged up the toppings in to little parcels.  I put both the sauces, almond brittle and mini meringues in little jars, topped them with a paper doily and some cute twine.  I stamped some little spoons and added them to the box and stamped the box lid and finally added the ice cream at the last minute.


Where to find
I purchased all of the items I use in my cooking - I have no sponsorship or brand partnerships at this stage. However, I thought some of you may be interested where I find some of the bits and pieces I use so here is a little list. Many of these items I already had in my beloved party, gifts and craft cupboard that has been collected over many years and a couple of items I purchased recently.

Twine & Syrup Jug - Emerald & Ella
Cake Box & clear food storage bags - Lomards
Jars - my own and collected by helpful friends and family members to add to my collections
Doilies, mini wooden spoons - Chef's Hat
The larger ice cream sundae bowls & yellow straws - General Trader
The shallow ice cream bowls - House
Large ice cream cones - Ritchies
Mini ice cream cones - Oasis Bakery

The end result of the Ice Cream Party was delicious and enjoyable, but it was even more fun making all of these items and packaging up the care pack - a lovely diversion and a fun project to share with my 3 year old.  A slightly odd expression of creativity perhaps, but thoroughly enjoyable!!!!

Anyone for a scoop?!

Love Amy xoxo