Showing posts with label Dulce de Leche. Show all posts

Wednesday, 19 September 2012

Dulce de Leche Shortbread Sandwiches


Yet another Dulce de Leche or salted caramel recipe!  See more here and here and here!

These are delicious little shortbread cookies sandwiched together with salted caramel in the middle.  I think they would make lovely gifts for a special occasion - fathers day, mothers day, a birthday or for Christmas.  

I made the Dulce de Leche and the shortbread mixture and cut the cookies out the day before. I kept them in the fridge (the cookies were raw) until the following day when I baked and assembled them.  The cookies also freeze very well.  I prefer to freeze them raw but already rolled and cut out. The on the day you are giving them away (or a day or two before), you simply bake them and pipe on the salted caramel.

Original recipe from Donna Hay Magazine. Issue 60.

Ingredients:
- 1 batch of Dulce de Leche - you can buy this at some delis or specialty stores. In theory, the canned caramel at the supermarket is the same thing, but in my experience it doesn't taste as good and this is very simple.  Details below.

- 150 grams of unsalted butter, softened
- 1/3 cup pure icing sugar, sifted
- 1.5 cups of plain flour, sifted
- 2 tablespoons of cornflour, sifted
- 1 teaspoon vanilla paste

Directions:

- Make your Dulce de Leche according to David Lebowitz's instructions that you will find here.  I omit the salt before cooking, as I prefer to add it afterwards - I like the salt flakes to be visible.  So, once it's nice and caramel, remove from the oven and sprinkle lightly with sea salt flakes.  Set aside to cool.


- Beat together the butter, sugar & vanilla for about 10 minutes or until pale and creamy
- Add the flours and beat until a smooth dough forms
- Roll the dough between two sheets of non stick baking paper to about 5mm thick
- Refrigerate for 30 minutes
- Preheat oven to 170 degrees Celsius
- Cut out the cookies using a 4cm cookie cutter - it makes approximately 50 individual cookies or 25 sandwiched cookies
- Place the cookies on lined baking trays and bake for approximately 10 minutes or until a very light golden colour - keep a close eye on them as you don't want them to get dark as they will be brittle
- Allow to cool on wire racks
- Pipe the cooled salted Dulce de Leche on to half of the cookies and top each with another cookie - I try to pipe in the middle of the cookie leaving some space on the edge so that when you sandwich the cookies together, the caramel doesn't come out.  This is mostly so if you are packaging them for gifts, the caramel doesn't stick to the packaging.


Enjoy!!!!

Love Amy xoxoxo

Wednesday, 4 April 2012

Home Made Easter Gifts

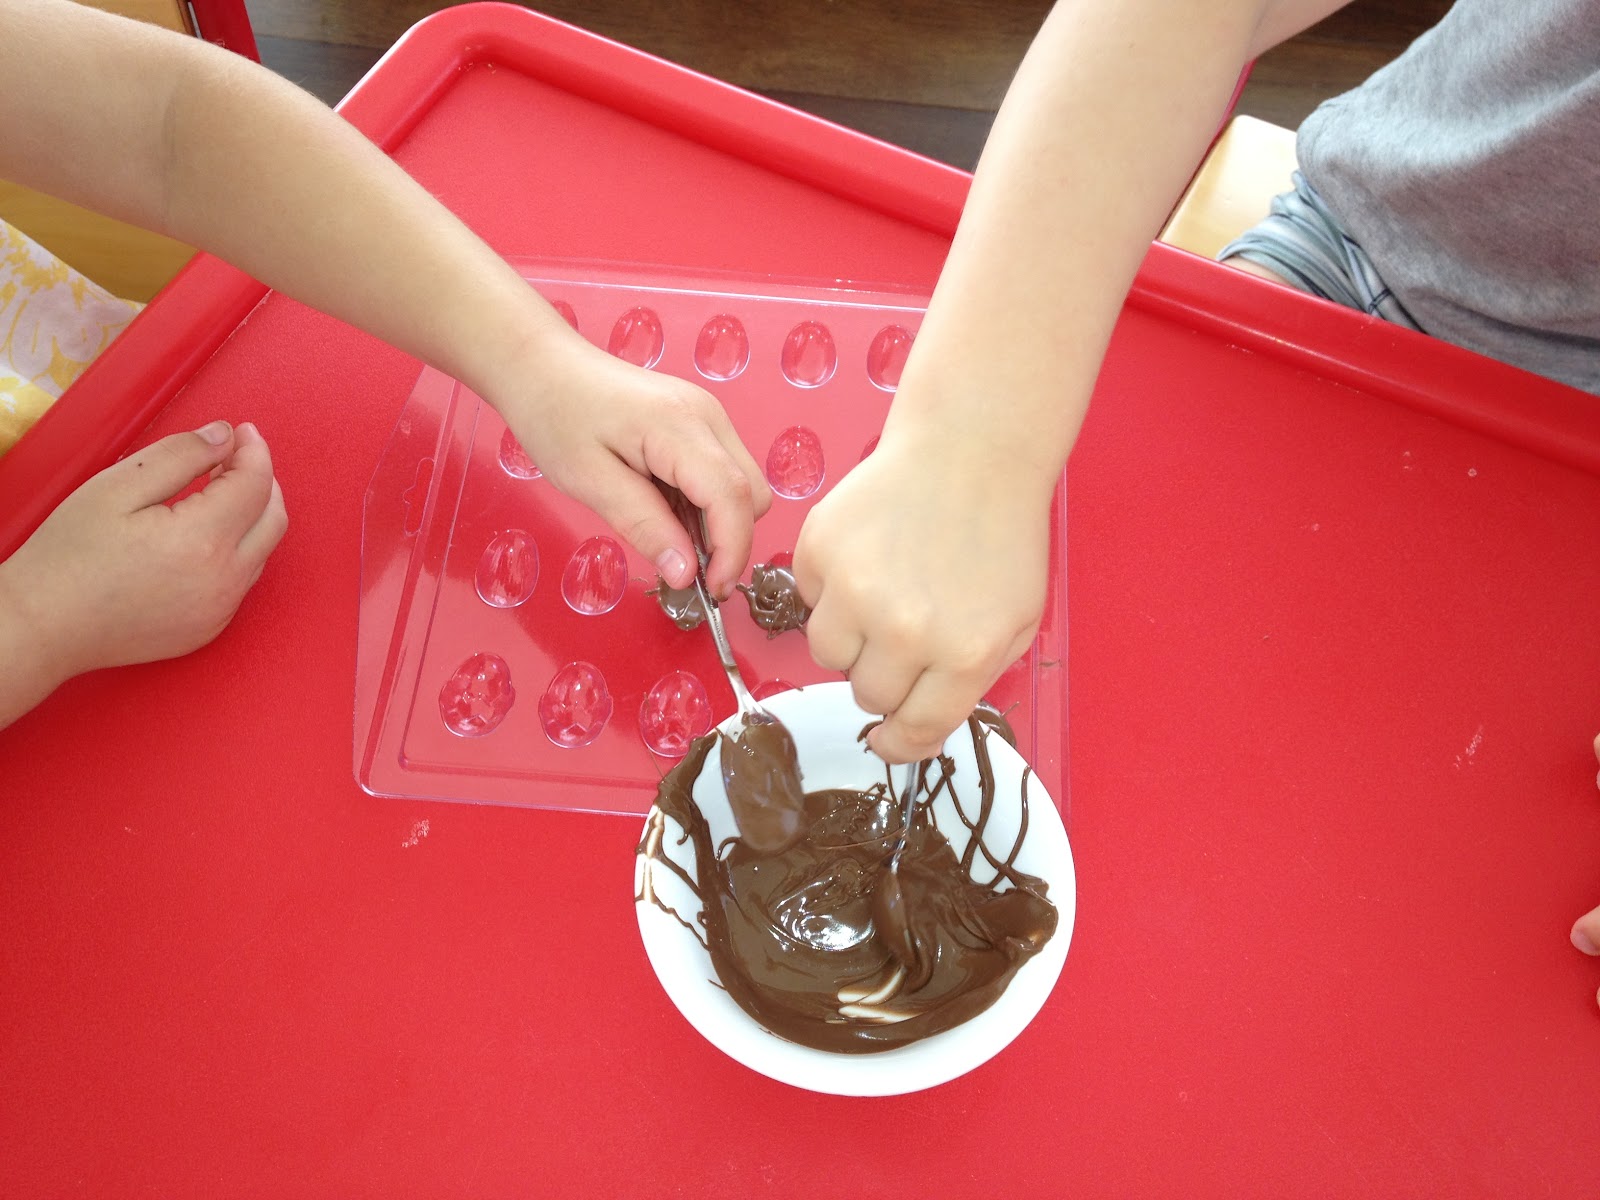
Here are some of the Easter treats we made for gifts this year.  I made these in a few batches - once on my own, once with Mr 3 and once with my friend Claire and her little Miss 3.  The two 3 year olds had a messy ball as you will be able to see in their handiwork!!!!


~ Chocolate eggs filled with salted caramel

Continuing with my salted caramel obsession, I had to try putting this delicious filling inside Easter eggs!  I made the caramel as per the Salted Dulce de Leche that I have referenced twice already - here and here! David Lebovitz's method is my favourite and you can find here.

While the caramel is cooking, prepare the hollow part of the eggs with melted chocolate. I like to use a combination of milk and dark and use the best chocolate I can afford/what is on special...I'm not sure it makes a difference to using chocolate melts, but I personally prefer the taste so use a nice chocolate where possible.


Once the caramel is cold, fill the hollow chocolate eggs with a drop of caramel and then covered it with more melted chocolate.


Once the chocolate has set, join the 2 halves together with some more melted chocolate.  On my first try, I had too much mixture, so the egg didn't join as nicely, so keep the mixture nice and flat for an even join.

First attempt at joining:


Second attempt at joining:


A delicious cross section of chocolate and salted caramel....yum!!!!


~ Freckle eggs

We first made solid eggs by making two solid halves, setting them, then joining them together with more melted chocolate. Then you can either paint or dip the whole egg in melted chocolate and then toss it in 100s and 1000s.  The kids used their hands (of course!!!) and liked to dip the whole egg in - you can see their deliciously messy results below. The paint brush technique was more my style! ;-)


Now, for the kids turn - let the fun and mess begin!!!!


As you can see, the kids enjoyed getting their hands dirty!!! Thank goodness for Claire tidying up along the way all day otherwise my house would have been even more of a barnyard at the end of this cooking adventure!  Of course, the kids enjoyed licking the spoons and their hands most of all. It was surprising that although they were surrounded by so much chocolate all day, they didn't really eat that much...luckily!

I also made some versions of these eggs that were hollow in the middle which were slightly more fragile, but delicious!!!

We made some dark varieties for gift recipients who are dark chocolate lovers and later this week I am making a special batch of white chocolate eggs for my husband.


~ Chocolate & Peanut Butter Easter Birds Nests.  Filled with mini birds eggs and mini chicks from Big W.  This was the most fun and easy for the kids to do.  I made these last year with my then 2 year old and he loved it and it was so simple and cute so thought we'd do it again.  I got the idea and directions from the fabulous Planning Queen Nicole - you can see her post and recipe/directions here.   It was actually after I'd made these and emailed photos to Nic that I first "chatted" with her.  She is one lovely lady and provides me with endless inspiration!  Being a bit more slap dash, I don't mold the nests in a bowl, but dollop large spoonfuls on to baking paper and then arrange in to a nest shape.


~ Maple Muesli - recipe on my blog here packaged up in recylced jars with material scraps and twine on top.

~ Cards & tags made at home on publisher, one zig at a time ;-) and bagged in to cheap but sturdy brown paper bags. I think you should be able to use the picture below as a little Easter gift tag of your own - punch a little hole in it and thread through some twine and you are set.


Happy Easter!  I hope it's a safe and happy and healthy and fun weekend with your loved ones.

Love Amy xoxo

Monday, 26 March 2012

Salted Dulce De Leche Brownies


Yes, I know I'm obsessed with salted caramel, but I can't help it!!!!

These little treasures are a hybrid of two recipes.  The first is David Lebovitz's oven baked Dulce De Leche (recipe can be found here) which I also use for my ice cream found here.  Without turning my little blog in to a David Lebovitz shrine, I must say I can not speak highly enough of his recipes!!!  If you are a keen ice cream maker, or want to be, you must check out his blog and his book "The Perfect Scoop". My absolute favourite (so far!) is his Butterscotch Pecan Ice Cream - AMAZING!!!!!!!!!!!  Anyway, back to brownies for now...

David has a recipe for dulce de leche brownies which you can find here. I made them once and they are dark and divine!  I, however, am quite partial to a "trashy brownie"!  By this I mean one that is less dark and a bit more sweet and a bit chewier and gooier!

So, for my actual brownie recipe, I used this one as a basis.  I really like this recipe and it was different to other brownies I've made before. Especially creaming the butter rather than melting it.  I changed the recipe a bit, mostly the chocolate components, so I will outline my version below, but purists, please feel free to go directly to the source for an excellent brownie!

Salted Dulce De Leche

Ingredients:
  • 1 can of sweetened condensed milk
  • Flaked sea salt
Directions:
  • Preheat oven to 200 degrees Celsius
  • Pour the sweetened condensed milk in a pie dish, cover with foil and place in a large baking pan and fill half way up with hot water.  Bake for 1-1 1/4 hours - remember to check regularly that the water level is still half way and top up as needed.  See more details on this process from the master here.
  • When the milk is dark and caramel, remove from oven and sprinkle with salt flakes.  Allow to cool completely.


Brownies

Ingredients:
  • 200 grams of best quality chocolate (I used half milk and half dark, but each to their own!!!)
  • 250 grams of unsalted butter - at room temperature
  • 250-300 grams of golden caster sugar (if you use more milk than dark, you can use less sugar if you like)
  • 3 large eggs plus 1 egg yolk, lightly beaten
  • 80 grams of plain flour
  • 1/2 teaspoon of baking powder
  • 40 grams of cocoa powder
Directions:
  • Preheat the oven to 170 degrees Celsius
  • Grease and line the base of a 23×33cm baking tray
  • Melt the chocolate gently over a pan of hot water, take off the heat and set aside to cool


  • Beat together the softened butter and the sugar until really creamy and fluffy

  • Slowly and gradually add the eggs while the mixer is still going. Only add more egg once the previous one is fully incorporated. Go slowly as you don't want the mixture to split!
  • Continue beating for 5 minutes until the mixture is very fluffy and has increased in volume 
  • With the beater on low, add the cooled melted chocolate and then the flour & baking powder - do not over mix at this point, but ensure the ingredients are all combined 


  • Pour 2/3 of the batter in to the prepared tin
  • Add tiny dollops of the cool salted dulce de leche all across the batter


  • Pour over the remaining batter and smooth out gently (the photo below makes the mixture look lighter than it was, but you the gist!)

  • Prepare a shallow ice bath - I just use my kitchen sink.  Make sure it's not too deep, otherwise when you plunge the pan in, the water will over flow in to the brownie and we do not want that to happen!  There is more information about the reasons behind the ice bath in the original recipe, but trust me, it was worth it!!!
  • Cook for 25 minutes and then check with a skewer. If the skewer comes out just a bit sticky, then it's done, but if the skewer is coated in raw mixture, then put back in the oven for 2-5 minutes. Check again. If needed, cook for another 2-5 minutes.  You don't want the mixture raw, but you definitely don't want it cake like, so do allow the skewer to be a bit sticky when you pull the pan out of the oven.
  • Plunge in to ice bath and leave for 1 hour...if you can resist it for that long!  


I packaged some up for gifts using regular brown lunch bags folded over and trimmed with a mini doily to fasten the tops. I heart doilies!!!!


I have another chocolate post coming this week, but after that, I will try to switch back to savouries...well, at least one! ;-)

Happy Baking!

Love Amy xoxo